Applying DTF Transfers with an Iron: Is It Effective?

The question 'can you use an iron for DTF transfers?' is more common than you might imagine — and for good reason. DTF (Direct-to-Film) printing has made personalized clothing more accessible than ever. But the truth is, not everyone has access to a commercial-grade heat press. That doesn’t mean you are out of options…
While DTF transfers are a little high-maintenance, they’re not like the old-school iron-on patches we used in the 90s. These things are durable, detailed, and designed to last.
Can your regular iron actually keep up?
In this article, we will discuss heat, pressure, film, adhesives, and all the little things that make or break a transfer. Because if you’re going to do it, let’s make sure you do it right.
What Makes DTF Transfers Unique?
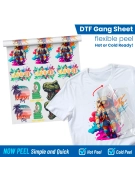
Before we start pressing hot metal against fabric, it helps to know what is actually happening beneath the surface. DTF transfers are printed using special water-based inks on a PET film. The design is then coated with an adhesive powder, which melts under heat and bonds the ink to the fabric.
This means the quality of your bond depends entirely on heat, pressure, and time. A heat press provides even, controlled application of all three. On the other hand, a household iron is a bit more unpredictable.
And while other transfers like HTV (heat transfer vinyl) can be forgiving, DTF is much less tolerant of variation. Uneven heat or pressure can lead to:
- Patchy or partially adhered designs
- Lifting or peeling after a few washes
- Warping or overburning the film
So when we ask, Can you use an iron for DTF transfers? we’re really asking, Can you replicate heat press-level consistency manually?
How Irons Really Work
Let’s not sugarcoat it.
Irons were made for smoothing wrinkles, not adhering graphics. But that doesn’t mean you have to give up on your ideas…
What Irons Can Do
A good-quality iron can reach temperatures close to those required for DTF—around 300°F to 320°F. If your iron has a cotton or linen setting, you’re probably in the ballpark.
You can also:
- Preheat your garment to remove moisture
- Apply heat for a short duration
- Use parchment paper or a Teflon sheet as a barrier
However, most household irons do not distribute heat evenly across the soleplate, offer any real pressure control, or stay consistent in temperature during longer presses.
And when it comes to pressure, this is the biggest hurdle. DTF adhesives are designed to melt into the fibers of the fabric with firm, even pressure. An iron relies entirely on your hand strength and positioning. This means inconsistent results are more likely than not.
Step-by-Step: How to Use an Iron for DTF Transfers
Are you determined to give it a shot? Whether you're prototyping, experimenting, or just trying to finish one last shirt on a Sunday night, here’s how to do it as effectively as possible.
Tools Required
- A flat, hard surface, unlike ironing boards as they move too much.
- Your iron, preferably with digital temperature settings
- Parchment paper or a Teflon sheet
- DTF transfer
- A stopwatch or timer
- Clean cotton t-shirt or fabric of choice
The Process
1. Prep Work: Preheat your iron to the “cotton” setting. Lay your shirt on a heat-safe surface.
2. Pre-press the fabric: Iron the area where the transfer will go for 5–10 seconds. This removes moisture and flattens fibers.
3. Position the Transfer: Place the DTF film design side up on the shirt.
4. Cover It Up: Place parchment paper or a Teflon sheet over the film to protect it.
5. Apply Firm Pressure: Press the iron down with both hands for 10–15 seconds on one section at a time. Do not slide the iron around.
6. Repeat: Move to the next section, slightly overlapping the last, until the whole design has been pressed.
7. Cool Peel: Let the film cool completely before peeling. Rushing this step can ruin your design.
8. Post-press: After peeling, give it another 10 seconds of pressure using the parchment paper for durability.
Expect mixed results. Even with care, the iron method is hit-or-miss. It can work for small graphics or one-time-use pieces, but anything you plan to wear or wash frequently is going to suffer in the long run.
Common Mistakes to Avoid When Using an Iron for DTF Transfers
If you are attempting this at home, here's something crucial to remember: DTF is not forgiving. One small mistake can lead to a ruined design. Or worse, a ruined shirt.
Here are the most common mistakes people make when ironing DTF transfers:
Using a Padded or Soft Surface
Most people naturally reach for their ironing board, but that’s mistake number one. Because ironing boards are designed to flex and move. You need a hard, heat-safe surface like a wooden table or countertop covered with a pressing mat or thick towel.
Skipping Pre-Pressing
Moisture is the enemy. If you skip the pre-press step, your fabric may hold onto water vapor, which creates a barrier between the adhesive and the fibers. Always iron the garment for 5–10 seconds before applying the transfer.
Sliding the Iron
Movement like gliding the iron when you are smoothing out dress pants causes uneven heating and pressure distribution. This might result in sections of your design not sticking at all. Always press down firmly and lift to move. Never drag.
Peeling Too Early
Patience is part of the process. DTF film is meant to be cold peeled, not peeled while still warm like some other types of transfers. Rushing the peel step could cause cracking, bubbling, or partial lift-off.
When Ironing Might Be Okay and When It Isn’t
Sometimes you need a temporary fix. Sometimes you’re making a sample. Other times, you're just trying to bring a creative idea to life and cannot wait.
Situations Where It Might Be Okay
- You are creating a test sample and just want to preview placement or design size.
- You’re applying a small graphic, such as a chest logo or a label-sized detail.
- You’re working with thin cotton fabric, which allows more heat to penetrate and bond.
- You’re okay with the design being temporary, like a one-time event shirt or costume piece.
But It’s a Hard No For:
- Bulk production or orders. Even minor inconsistencies add up and look unprofessional.
- Complex or large designs, which are extremely hard to align and press evenly by hand.
- Stretchy or synthetic fabrics that need a lower temp and precise control.
- Long-term or high-wash-use items, like uniforms or everyday apparel.
When you look at the risks and the amount of effort, the real question isn't “Can you use an iron for DTF transfers?”
It’s “Should you?”
Alternatives If You Don’t Have a Heat Press
If you’re serious about making DTF work but still not ready to drop hundreds of dollars on a professional heat press, here are some options to bridge the gap.
Portable Heat Press Machines
These are smaller, more affordable alternatives designed for crafters. They offer:
- Adjustable temperature control
- Built-in timers
- Flat plates for better pressure
They are still not industrial-grade, but they outperform household irons by miles.
Cricut EasyPress or Similar Tools
Originally created for HTV, these can also work on DTF with proper technique. The key is to ensure:
- The plate heats evenly
- You apply consistent, firm pressure
- You follow the exact temperature and time guidelines
Community Makerspaces or Local Print Shops
If you don’t have a heat press, look for someone who does. Many makerspaces and local print shops let you rent time on their equipment for a small fee. It’s cheaper than buying your own and gives you better results.
Final Verdict: Can You Use an Iron for DTF Transfers?
Technically, yes. But effectively, reliably, and professionally? That’s a bit difficult.
There is just too much room for inconsistency. If you're a hobbyist experimenting or making a one-off gift, go for it. But if you care about long-lasting, high-quality results, a proper heat press or even a portable alternative will save you time, frustration, and money.
While the internet may be full of mixed opinions, real-world results depend on how carefully you follow the process. Even the smallest shortcuts can lead to poor adhesion, fading, or cracking. That’s why understanding both the capabilities and the limitations of your tools is just as important as the design itself.
So back to the original question: can you use an iron for DTF transfers?
Yes.
But proceed with caution and low expectations.
Find Perfect DTF Transfers at DTF Transfers Now
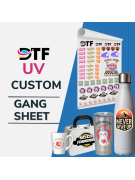
If you want your designs to truly shine with bold colors, sharp lines, and long-lasting wear, you need transfers that are made with precision. At DTF Transfers Now, we specialize in premium DTF transfers that perform their best when pressed right.
Whether you have a pro-grade setup or are just starting out, we’ll make sure your designs arrive ready to impress. Explore our ready-to-press transfers today and level up your custom apparel game today!
Leave a comment