Professional T-Shirt Printing: A Step-by-Step Guide

Do you want to know how to print on t-shirts professionally?
Some blogs ask you to use Canva and hit print, but the actual process that goes into creating shirts is slightly more detailed.
Especially if you want people to remember, keep and wear your products.
The best part is that professional-quality t-shirt printing is totally within reach, and it’s not about buying the most expensive machine on day one.
All you need to do is understand the method that best fits your goals, how to design for your materials, and how to avoid the trial-and-error period.
Let's walk through tried-and-tested steps of printing t-shirts that experienced printers can swear by.
Step 1: Know What You Are Aiming For
Before you even think about colors, tools, or transfers, you need to get clear on one thing—what are you printing for?
- Is this a one-time custom run for an event?
- Are you building a clothing line with a strong visual identity?
- Do you need vibrant full-color graphics that won’t crack or fade?
- Are you working with cotton, poly, blends, or specialty fabrics?
The answers to these questions guide everything else.
Every method for printing on t-shirts has its pros and tradeoffs.
When you know your purpose, you’re less likely to waste time and money.
Step 2: Choose the Right Printing Method
This matters more than you think.
What looks good on Instagram might not hold up after five washes.
Here’s a breakdown of the most common pro-level printing options and when to use them.
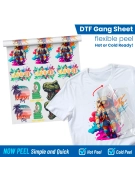
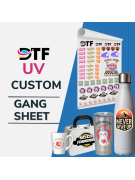
Direct-to-Film (DTF): Versatile and Durable
DTF is a newer method that's growing fast—for good reason.
It works on almost any fabric and gives sharp, detailed prints without needing pretreatment.
It’s great for full-color designs and works well for small batches or on-demand orders.
- Great for cotton, polyester, blends, and dark fabrics
- Works for detailed and colorful designs
- Transfers can be pre-printed and applied later
Screen Printing: Best for High Volume
Screen printing is the OG of t-shirt printing.
It offers bold, long-lasting prints, especially when you're doing large quantities of the same design.
One downside is that it is not cost-effective for short runs or multicolor designs.
- Best for 1–3 color designs
- Ideal for bulk orders
- High upfront setup time and cost
Direct-to-Garment (DTG): High Detail, Lower Durability
DTG uses a printer to apply ink directly to fabric.
It’s great for photorealistic designs and small batches but struggles with durability and fabric type limitations.
- Works best on 100% cotton
- Requires pretreatment
- May not last as long as DTF or screen print
Heat Transfer Vinyl (HTV): For Simple Custom Work
HTV is accessible and often used by beginners.
It's best for text or basic graphics. Not ideal for full-color images or business-level production.
- Labor-intensive for large orders
- Not as durable over time
- Limited color layering
Our Recommendation: If you’re still figuring out your niche but want flexibility, DTF is a smart place to start.
It balances quality and cost, and you don’t need to commit to bulk orders upfront.
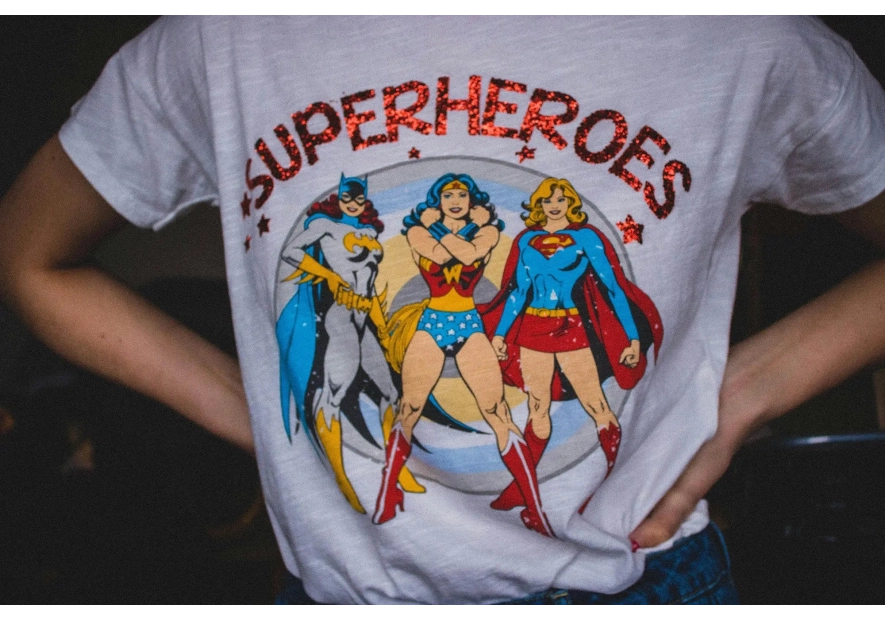
Step 3: Design Like a Pro
You could have the best equipment in the world, but a bad design will still look... bad.
Learning how to print on t-shirts professionally means knowing what makes a design “print-ready.”
File Types and Resolution
Always design in high resolution. You want:
- At least 300 DPI (dots per inch)
- PNG format with a transparent background
- CMYK color mode if you’re prepping for print
Note: RGB looks good on screens, but printers use CMYK. Ignoring this detail can wreck your color accuracy.
Size and Scaling
Don’t just drag your logo across the chest.
Think about placement, size, and visual balance.
A left chest logo print has different dimensions than a full front design.
Avoid Common Mistakes
- Don’t use thin lines that will disappear when printed
- Don’t forget to convert fonts to outlines
- Don’t rely on your printer to “fix” a blurry or low-res file
If you’re not confident in your design skills, tools like Canva, Adobe Illustrator, or design marketplaces with print-ready templates are great options.
Step 4: Prep Your Garment
You’ve got your design.
You’ve got your method.
But if you skip garment prep, even the best design can come out looking cheap or misaligned.
Choose Quality Blanks
Don’t cheap out on your base. The shirt itself affects how ink sets, how transfers adhere, and how long everything lasts.
- 100% cotton is soft and print-friendly—great for DTG and DTF
- Cotton-poly blends are versatile and wrinkle less
- Triblends feel amazing but need special care when printing
Tip: Always test your method on your blank before scaling up.
Smooth It Out
- Wrinkles, lint, and static are your enemies
- Use a lint roller to remove debris
- Pre-press the shirt for 5 seconds to flatten seams and remove moisture
- Center your shirt using a ruler or laser guide if possible
A few extra seconds here can be the difference between basic and great.
Step 5: Be Careful When Transferring
Now, you will finally transfer your print onto your fabric—and this is where precision matters.
DTF transfers let you print your design on a film, then apply it to a shirt using a heat press.
You can also order DTF transfers without owning any printing equipment.
Here’s how to get that crisp, long-lasting finish:
- Align Your Transfer: Position the film on your prepped shirt. Use guides or light creases to center it accurately.
- Set the Heat Press: Use a temperature of around 300–325°F (check the film instructions), with medium pressure.
- Press It: Press for 15–20 seconds. Let it cool slightly, then peel cold for best results.
- Repress for Finish: Once peeled, cover with a Teflon sheet or parchment paper and press again for 5–10 seconds.
This locks in the design and gives a professional feel.
Tip:
Use consistent pressure. Uneven pressure leads to poor adhesion.
Also, test press times if you’re switching fabrics.
Step 6: Finishing Touches
The pros know that printing on t-shirts professionally isn’t just about getting the design on the shirt.
It’s about the final touches that make your shirt retail-ready.
Do a Quality Check
- Check for cracks, fading, or peeling.
- Confirm the design is centered and straight.
- Don’t forget the back—watch for press-through or heat marks.
Fold, Bag, and Label
- Use folding boards for consistency
- Let the shirt cool before packing
- Add size tags, neck labels, or custom packaging to boost branding
Care Instructions Matter
- Print or include care guides: wash inside out, cold water, low dry heat
- Even DTF benefits from a little TLC
- Helps keep designs vibrant for longer
Step 7: Troubleshooting and Learning
Even seasoned pros run into hiccups.
The difference is knowing how to fix and learn from them.
Common Mistakes and How to Fix Them
-Transfer lifting at the edges: Press time too short or pressure too light. Increase both.
- Print looks dull or faded: Source file might be low-res or heat setting might be off. Double-check both.
- Design crooked or off-center: Use rulers, guides, or crease marks to center designs.
Track What Works
Keep a notebook or spreadsheet with:
- Heat press settings by fabric type
- Customer feedback
- Best-performing blanks and transfer types
This data becomes invaluable over time, helping you build a consistent, scalable workflow.
Take Out the Guesswork and Trust DTF Transfers Now
Now you’ve seen that printing on t-shirts professionally is a real craft.
It's part design, part science, and a whole lot of attention to detail.
Whether you're just getting started or looking to level up, every step in this guide matters.
If you're looking for high-quality DTF transfers for printing, DTF Transfers Now has you covered.
They specialize in fast, vibrant, press-ready transfers that help you focus on what matters most:
building a brand that lasts.
Leave a comment