DTF Sizing for Shirts: Ensuring Perfect Fit Every Time
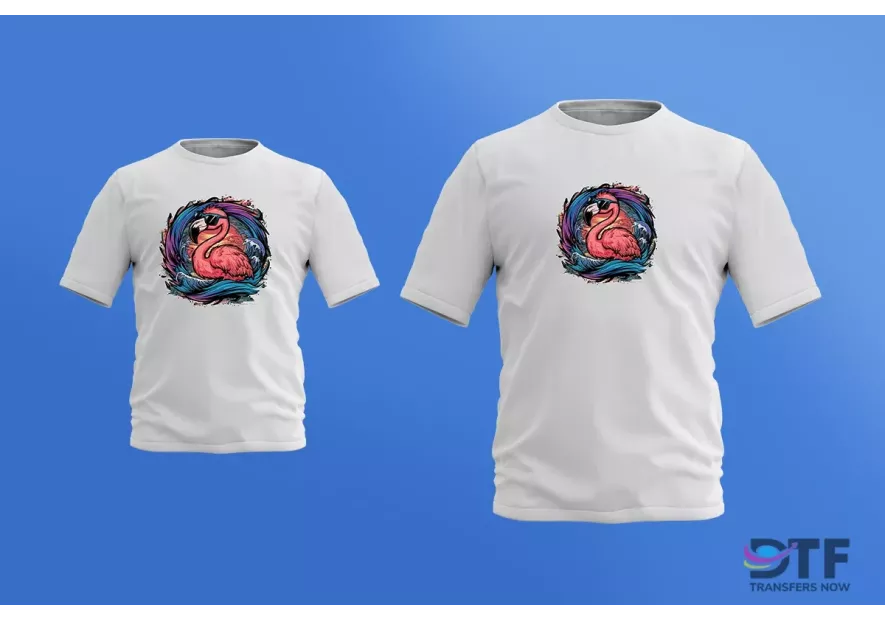
Direct-to-film (DTF) printing is the go-to for adding custom designs to shirts. But, DTF sizing for shirts can be tricky, especially if you’re new to it.
Believe it or not, the size of the design is just as important as the actual design–too big, and it will look awkward — too small, and it will barely be noticeable.
Then there’s the fact that not all designs vary quite a lot in terms of their shape and symmetry.
But worry not, as this guide will help you understand DTF sizing for shirts, which are standard sizes for kids and adults.
Understanding DTF Sizing
DTF transfer sizing refers to the dimensions of the printed design that will be transferred onto a t-shirt.
The transfer size directly affects the design’s placement, proportionality, and visual impact.
For example, a design that looks great on a small t-shirt might appear lost or disproportionate on an extra-large shirt.
Standard t-shirt sizes (e.g., small, medium, large, extra large, and so on) play an important role in determining the appropriate transfer size for each shirt.
Your DTF or vinyl transfer size should be according to the shirt size. Assuming you’re going to be accommodating different sizes in your shirt collection, you’d need to create DTF transfer sizes corresponding to each size and the intended placement of the design.
The Role of Placement
Don’t forget where you intend to place the design via the DTF transfer.
For instance, the size would be small if you want a logo or text printed on the sleeve.
However, you'd need a big print for a design that covers the entire back (think elaborate graphics or rock band portraits).
Let’s quickly go over your placement options and corresponding size recommendations before we list the actual sizes.
Center Chest
This is the most commonly used placement in custom t-shirt designs. It sits a little below the collar and perfectly centered on the chest.
The size of the design is moderate. But depending on what it’s like, it may cover the entire chest. For example, a font that runs across the chest.
.webp)
Full Front
This placement covers the entire front of the shirt except for a couple of inches below the collar and a couple of inches above the hem.
This placement is good for portraits of people/characters or incredibly detailed multi-element graphics.
It’s too big of an area to be covered with font or logos.
Left/Right Chest
The classic left chest placement is very commonly used for logos. However, you could also go with the right chest placement.
This placement requires a small DTF transfer size, usually no more than five inches.
Besides logos, it’s also a great placement for small custom designs if you want to give the shirt some character in a subtle way.
Upper Back
The upper back placement is similar to the center chest in design size. However, it’s placed a little closer to the back collar.
This placement is good for text, logos, and symbols.
The size of the DTF transfer would typically be a few inches tall, whereas the width would depend on the design.
Full Back
The full-back placement is similar to the full front, covering the back of the shirt except for the edges.
It’s common to pair full-back prints with left or center chest prints. However, that’s not necessarily a rule.
Sleeve
Sleeve DTF transfers would typically range in two to five inches in size. This placement is good for symbols and logos.
Other Factors to Consider for DTF Sizing
Besides the size of the shirt and placement of the design, you may want to keep in mind the following things:
- Design Type: Consider the type of design you have and what you want to achieve with it. For instance, if it’s a logo, you may want maximum visibility, which can come from a central placement. Each type of design requires specific size adjustments to maintain visual harmony.
- Target Audience: The intended wearer — adult, child, or unisex — can influence sizing decisions. Children’s t-shirts, for instance, require smaller transfers, while gender-specific cuts may require different adjustments.
- Transfer Film Capabilities: DTF films come in various sizes, such as A4, A3, and A3+. You also have to consider those sizes for your designs. For instance, if the maximum size you can print is A3, that’s what you may have to work with even if the shirt size is 3X. Knowing the limits of your film size is critical for avoiding design scaling issues. That said, custom-sized films can be used for oversized designs or unique requirements.
DTF Sizing for Shirts
Below is a chart for the DTF transfer sizes for kids and adults, according to the placement. Not that the ranges of the width and height of the design are for small to large sizes. Adjust the dimensions accordingly if you’re working with XS or XL sizes.
| Placement | Width | Height | Height | Average Kids Size | Placement Measurements | ||||
| Center Chest | 6″ to 10″ | 6″ to 8″ | 8″ width | 4″ height | 6″ width | 3″ height | 4″ to 5″ from the collar, centered – taller designs can start 3″ down | ||
| Left Chest | 2.5″ to 5″ | 2.5″ to 5″ | 4″ width | 2″ height | 3″ width | 1.5″ height | 3″ – 4″ from the collar, centered over the far edge of the collar | ||
| Full Front | 10″ to 12″ | 10″ to 14″ | 11″ width | 11″ height | 9″ width | 9″ height | 3″ from collar, centered – designs 6″ or shorter may go 4″ down | ||
| Upper Back | 10″ to 14″ | 1″ to 6″ | 12″ width | 4″ height | 10″ width | 2.5″ height | 3″ to 4″ down from the collar, centered, designs less than 2″ tall can go 5″ down | ||
| Full Back | 10″ to 14″ | 6″ to 15″ | 12″ width | 14″ height | 10″ width | 12″ height | 3″ to 4″ down from the collar and centered |
DTF Sizing Guide by Shirt Type
The size of your DTF design should complement the type of shirt. For instance, a full front or back design wouldn’t work for a tank top. Here are some guidelines:
- Standard Crew Neck T-Shirts: A design size of 10” to 12” works well for medium adult shirts. Adjust proportions slightly for smaller or larger sizes.
- V-Necks and Tank Tops: Consider the neckline’s shape when placing designs. For tank tops, ensure designs don’t overlap armholes.
- Kid’s Shirts: Opt for smaller dimensions, such as 6” to 8” inches, to suit the reduced fabric area.
- Specialty Shirts: To maintain visual appeal, hoodies, and oversized t-shirts require larger or repositioned designs.
Tools and Techniques for Accurate Sizing
Once you’ve finalized the design, you should consider sizing it according to the shirt size and placement before sending it for printing. That will make things much easier and prevent any mistakes.
Here are the tools and techniques to get that right:
- You can utilize programs like Adobe Photoshop, CorelDRAW, or Canva to create precise layouts for your DTF transfers. These tools allow you to set exact dimensions and visualize the final output.
- Use mockups to preview your design on different t-shirt sizes before printing the entire batch. This helps identify proportional issues before printing.
- Always scale your design proportionally to prevent distortion.
- Maintain high-resolution files to ensure clarity when resizing.
Common DTF Sizing Mistakes to Avoid
Don’t make the following mistakes:
- Overestimating or Underestimating Design Size: Designs that are too large can overwhelm the shirt, while overly small designs may go unnoticed. Always test your transfer on similar shirt sizes before finalizing the actual size of the design.
- Ignoring Shirt Material Shrinkage: This doesn’t have anything to do with the size of the DTF but with its outcome and quality. Some fabrics shrink after washing, potentially altering the design’s appearance. Choose pre-shrunk garments or account for shrinkage in your sizing.
- Misalignment During Transfer: Proper placement tools, such as alignment rulers, help ensure your design is correctly positioned. Invest in such tools to ensure your placement is accurate when applying the DTF transfer with the heat press.
It Takes Time!
Mastering DTF sizing is essential for creating custom t-shirts that stand out. However, it may take some trial and error at first.
Still, you can get the desired results faster by understanding shirt dimensions and using the right tools.
Take the time to test, adjust, and refine your approach, ensuring that each design is a perfect fit, no matter the shirt size.
Once you have your design and sizes sorted, DTF Transfers Now can get you the DTF transfers for your shirts that are ready to be printed on your shirts.
FAQs
How do I measure a t-shirt for accurate DTF placement?
Use a ruler or measuring tape to determine the width and height of the intended placement area.
You can use the chart above to find the distance from the collar, sleeves, or hem for the placement.
Can I use the same design for all shirt sizes?
While possible, resizing for each shirt size ensures better proportionality and visual appeal. This is all the more relevant for XS and XL sizes, which are smaller and larger than the usual S, M, and L sizes.

Leave a comment