Direct-to-film (DTF) printing is an easy and reliable way to print customized designs on clothing, accessories, etc. One of the main components of this process is the transfer paper.
You must know how to use the transfer paper to print your designs accurately. It’s this paper that ultimately prints the designs on the substrate.
This article provides a detailed, step-by-step guide to help you master the process of using transfer paper for flawless results.
DTF and Transfer Paper Basics
DTF, or direct-to-film printing, is a method that allows you to print designs directly onto a special film, which is then transferred onto fabric or other surfaces.
Unlike traditional methods like screen printing or vinyl transfers, DTF printing works seamlessly on various materials, including cotton, polyester, and blends.
It’s especially popular for its vibrant colors, durability, and flexibility.
You need specialized DTF printers and some other components, including the transfer paper.
The Role of Transfer Paper
Transfer paper is the medium used to carry the printed design from the DTF printer to the final material.
High-quality transfer paper ensures accurate reproduction of your design, prevents smudging or tearing, and facilitates proper adhesion during the heat press process.
Here’s why it’s so important for DTF printing:
- - Ensures precise alignment of the design.
- - Maintains the vibrancy of colors.
- - Reduces the risk of damage to the design during transfer.
Types of DTF Transfers
Depending on your project, you may need a specific type of DTF transfer paper. Here are the main types:
- - Hot Peel Transfers: These transfers require peeling the film while it is still hot, resulting in a matte finish and faster processing times.
- - Cold Peel Transfers: These transfers involve peeling the film after it has cooled completely, producing a glossy and highly detailed finish.
- - Glow-in-the-Dark Transfers: These transfers illuminate in low-light conditions, perfect for novelty or safety-focused applications.
How to Use Transfer Paper for DTF?
Before discussing the whole process, let’s cover what you’ll need other than the transfer paper to make DTF prints on clothing and merchandise.
Materials and Tools You'll Need
Before diving into the process, gather the following supplies:
- - DTF Printer: A printer specifically designed for DTF printing with compatible inks. You can find this in new or used conditions online and at retail stores. These can cost quite a lot.
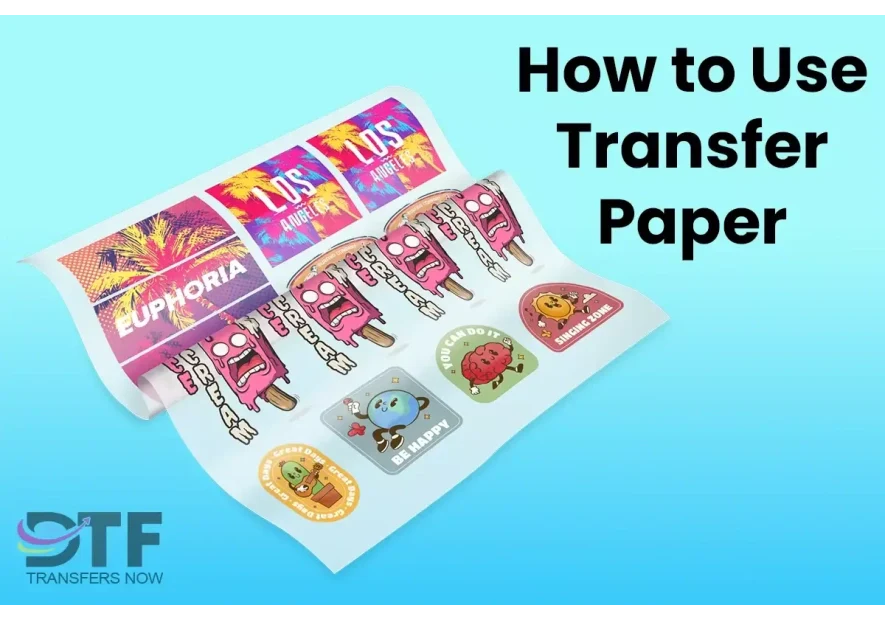
- - Transfer Paper: You need DTF film or transfer paper to print the designs with the DTF printer. Choose a high-quality transfer paper suitable for DTF. They come in rolls.
- - Heat Press Machine: Besides the printer, you also need a heat press machine, which will be used to transfer the design to the substrate.
- - DTF Powder: This powder ensures the design bonds properly to the fabric.
- - Fabric or Material: This is the surface where the design will be applied. This could be a piece of clothing, cap, shoes, mug, flask, etc.
- - Design Software: If you’re making the design yourself, you’ll need the right software to create and prepare the file for the DTF printer.
Preparing Your Design for Transfer
Step 1: Create or Select Your Design
Use design software such as Adobe Illustrator, Photoshop, or any graphic design tool to create your artwork.
Ensure the design has a high resolution (300 DPI or higher) for sharp and vibrant results.
Step 2: Optimize the Design
Mirror or invert your design if necessary. This is crucial if your artwork contains text or directional elements.
Consider using bold and vivid colors, as these translate well during the DTF process.
Printing and Preparing the Transfer Paper
Step 1: Set Up the Printer
Load your DTF printer with compatible inks.
Adjust the printer settings according to the transfer paper type and fabric you use.
Step 2: Load the Transfer Paper
Insert the transfer paper into the printer, ensuring it is aligned correctly.
Print the design onto the transfer paper, checking for even ink distribution.
Step 3: Apply PDTF Powder
Sprinkle the DTF treatment powder evenly over the printed design while still wet.
Shake off any excess powder, ensuring a thin and consistent layer remains.
Step 4: Cure the Design
Place the transfer paper in a curing oven or under a heat press at low pressure. This step solidifies the powder and prepares the design for transfer.
Transferring the Design to Substrate
Step 1: Prepare the Surface
Ensure the surface where you plan to apply the design is clean and free of dust or debris.
Position the fabric on the heat press and secure it to prevent movement.
Step 2: Position the Transfer Paper
Place the transfer paper on the surface with the design side facing down.
Align the design carefully to avoid misplacement.
Step 3: Heat Press the Design
Set the heat press to the recommended temperature (usually around 320°F/160°C).
Apply firm pressure for the specified time (typically 15-20 seconds).
Ensure even heat distribution to achieve consistent results.
Peeling and Finishing Touches
Step 1: Peel the Transfer Paper
Follow the manufacturer’s instructions to determine whether to peel the paper while it is hot or wait until it cools.
Peel slowly and steadily to avoid damaging the design.
Step 2: Final Press (Optional)
For added durability, place a protective sheet over the design and press it again for 5-10 seconds. This can also be used to remove that shiny look of the print and make it more matt.
Step 3: Inspect the Design
Check for any imperfections or incomplete transfers. Use a heat press to fix minor issues if necessary.
How Do You Use Transfer Paper without a DTF Printer?
For DTF printing, you need a DTF printer to print the designs on the transfer paper before transferring the design onto the substrate.
What if you don’t have a DTF printer? The simple solution is to obtain pre-printed transfer paper, that is, have your design printed on transfer paper.
Then, you simply need a heat press and a few other things to print the design onto your medium.
If you have a custom, small-scale project, investing in a DTF printer worth thousands of dollars doesn't make sense.
Instead, you can print your design on transfer paper and get the transfers to your doorstep.
DTF Transfers Now offers exactly that - easy-to-use transfers with your customized designs on them.
Printed transfers can make the process so much easier, whether you want to personalize a t-shirt or create branded mugs for your business.
For non-fabric surfaces, you can order UV DTF stickers that you can simply apply and peel off.
Common Mistakes to Avoid
When using transfer papers for DTF printing, watch out for the following mistakes:
Using low-quality transfer paper or inks: Pay attention to the specifics of the transfer paper, particularly opacity and thickness. The higher the opacity and thickness, the more coating the paper has.
Skipping the DTF powder or curing steps: Don’t skip out on the DTF powder, as that will improve the adhesion of the coating with the substrate. In many cases, you can make do without the powder. However, it’s highly recommended, especially for objects that will be used and washed frequently.
Applying uneven pressure during the heat press process: Ensure that the heat press covers the entire surface where the print will go and applies pressure evenly. Uneven pressure can result in inconsistent print quality.
Tips for Choosing the Right Transfer Paper
Not all transfer papers are created equal. Look for papers that:
Are compatible with your DTF printer and inks.
Can withstand high heat without curling or warping.
Provide a smooth surface for optimal ink transfer.
Again, pay attention to the specifics of the transfer paper. It should also be suitable for the type of peel you need, that is, hot or cold peel.
DIY DTF Printing with Transfers
Using transfer paper effectively is key to achieving perfect DTF designs. By following the steps outlined in this guide, you can create vibrant, durable, and professional-quality designs on various materials.
And the best part is that you don’t need a DTF printer to get into this type of printing. You can have your designs printed on DTF transfers with DTF Transfers Now!
FAQs
How long do you press DTF transfers?
DTF transfers should be pressed for 10 to 20 seconds. After that, they need 30 seconds to cool down (if they were heat-pressed).
DTF transfers don’t take long, which is why they’re preferred over other methods.
Do you need powder for DTF transfers?
Applying powder on the DTF transfer before pressing it onto the substrate can help improve its adhesion and quality. While not necessary, this step can improve the longevity of the print.
So, using the powder on the DTF transfer is highly recommended.
Why is my DTF not sticking?
A DTF transfer might not be sticking due to several reasons, including incorrect heat press settings (temperature, pressure, time), poor quality DTF powder or ink, not enough adhesive powder applied, moisture in the garment, improper storage of transfers, or environmental humidity issues; essentially, if the heat press isn't applying enough heat or pressure to properly activate the adhesive on the transfer, it won't bond with the fabric effectively